CONTENTS:
CONTENTS:
There are several ways to transfer a printed photo to canvas.
We love the look of a canvas print and photo transfers make a great gift.
We look at the simplest and most popular method to transfer photos below.
Transferring An Image To Canvas With Gel Medium
This is the same method we used when transferring an image to wood and creating a custom wood sign.
You can even transfer a photo or graphic onto a wood guitar with gel medium! It’s the most popular way to transfer a photo to canvas.
How To Transfer Photos onto Canvas
Step 1: The canvas
Your first step is to get a canvas. They come in all sorts of pre-framed sizes and they’re available at your local craft store.
These canvases will already be stretched and mounted on wooden frames.
They usually sit anywhere from half an inch to an inch in depth.
These photo transfers make great wall art because they’re easy to hang but also stand on their own on a windowsill or shelf.
Step 2: Regular printer paper
Print the image you want to transfer onto plain paper.
Actually, we have had good results using thin sheets of paper in our inkjet printer.
Print your image on your home inkjet printer or laser printer.
There are pros and cons to inkjets and lasers, but both laser prints and inkjet images will work to create an image for photo transfer.
Should I use photo paper?
We don’t recommend it. It’s only going to mean more paper to remove/rub off later.
In this case, you are better off using plain printer paper to transfer photo or graphic images to canvas.
Photo paper is very thick, with a glossy finish.
This doesn’t work great for image transfers. You want to use plain paper in order to get the cleanest finished project on your stretched canvas.
Should I use tissue paper?
If you’re careful you can print on tissue paper. The benefit of using tissue paper is that it dissolves easily when wet.
Tissue paper makes removing the image backing a breeze.
- Cut the tissue paper to precisely the same size (or slightly smaller) than the paper size you will be feeding through your printer. (11”x17”, 8.5”x11”, etc.)
- Gently smooth the tissue paper atop a guide sheet and attach the edges of the tissue paper with tape or a glue stick. This guide sheet is the tissue paper’s “tour guide” while printing, providing clean edges for the feeder rollers to grab and support for inkjet photos or toner application.
- Run the guide sheet with attached tissue paper through your printer. You can use either an inkjet or a laser printer for this step. Make sure you position the sheet in the printer so the ink or toner ends up on the tissue paper and not the guide sheet behind it.
(If you do make this mistake, simply flip the paper over and print the image again.)
Tissue paper can be fickle, so make sure it’s completely flat before running it through the printer.
Should I use a color laser printer?
We personally like the end result a laser printer delivers when creating a transfer image.
An inkjet photo printed on photo paper is glossy, but you don’t want that when you transfer images.
Toner forms a thin layer of plastic to create images.
Toner images adhere well to the latex gel and are slightly easier to work with during the damp sponge stage.
While inks tend to print a bit more vibrantly than color toner, it can also run and/or blur if the transfer medium is unevenly applied.
This doesn’t happen with toner.
For that reason, we recommend using color laser printers for your next photo transfer project.
Should I use an actual photograph?
NO! Absolutely not! Photo chemicals don’t play nice with the coat of latex transfer medium.
Only half your photos will transfer, if that, and you’ll ruin your favorite photo!
Step 3: The image
You will need some sort of photo editing software to flip the image horizontally so that it appears properly on the canvas.
You may also need photo editing software to remove any personal information that appears on your photos.
Size up your photos and print away!
You will need to trim the image to the canvas size or allow the full image to roll over the edges of the canvas and wood frame and trim it after it has dried.
We like this method…it adds a layer of depth and professionalism to your project.

Step 4: The gel medium
There are a variety of choices when transferring an image to canvas.
A transfer medium will grab and hold the ink and toner used to create your image and adhere it to the surface of the canvas.
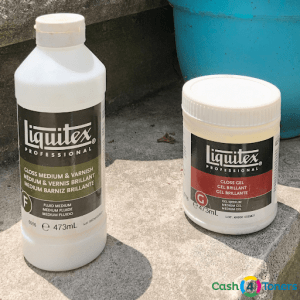
We’ve personally had a lot of success with Liquitex medium matte gel.
You cannot use PVA glue — common school glue — for this project. You’ll need a gel medium to successfully transfer your photo to canvas.
We have seen successful photo transfers onto canvas using Mod Podge as a transfer medium but we don’t recommend this method.
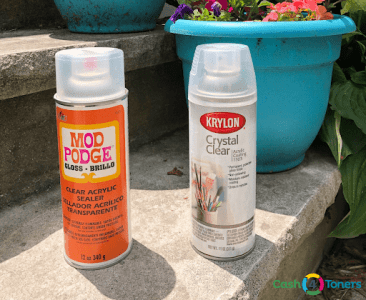
Grab a spray can of Mod Podge for your glossy final coat, but use a latex-based gel medium for your next photo transfer project.
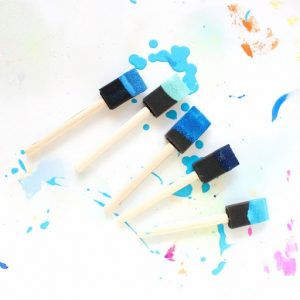
Whatever transfer medium you choose, you will need an inexpensive paintbrush or foam brush to liberally coat the surface of your canvas.
Try not to miss any spots. The gooey, glue-like latex gel will grab and hold your image forever once it dries clear.
Step 5: The Image Transfer
Place your photo face down onto the canvas and press it firmly into the transfer medium.
Use a squeegee, old credit card, or some other type of smoothing tool to smooth the image and remove air bubbles.
You want your photo to make flat, solid, and complete contact with the wet surface of the canvas.
Once your image is properly placed, allow it to dry completely.
If you’re in a hurry, you can wave a hair dryer over the surface of the canvas until it is completely dry.
Once the photo is dry, you can trim any excess around the edges.
Step 6: Water Spray
Fill a spray bottle with lukewarm tap water, and lightly mist the backing of your photo.
Let the water soak in before gently rubbing the wet paper with your fingertip. It should peel away in curls.
The only thing you have to be careful of is not to rub too hard and tear the image.
Gently rub the edges of the photo removing as much paper as you can.
Let the canvas dry.
Repeat this process until all of the paper is removed and only the photo remains.
It may take several attempts, but your photo will grow progressively less “fuzzy” with each attempt.
If you don’t have a spray bottle filled with water you can also use a damp sponge or moist paper towel to wet the paper and help remove the paper backing.
Step 7: The Rubdown
Once you get the initial backing off, let the photo dry. Your photo will appear hazy.
Repeat the process, slowly rubbing in a circular motion until all of the paper is removed.
Step 8: The Finish
We’ve seen people wipe the surface of their canvas artwork with a drop of virgin olive oil to give it a healthy sheen and to make the colors pop.
Use mod podge to get a more professional look like a satin or gloss finish.
Mod podge makes several finishing sprays. (And it’s called “mod podge” not “modge podge.” Any amateur crafters say “modge podge” … though, admittedly, it is fun to say!)
In general you can use the same finish that you would on paint. We like to use mod podge since it’s easy to use, readily available, and comes in a variety of water resistant finishes, from shiny to matte. Apply several coats when you use Mod Podge to build up a strong protective layer of gloss finish onto canvas surfaces.
Transfer an inkjet printed photo to canvas
Using a photo created on a regular printer usually works fine, as long as the gel transfer medium is evenly applied.
Thick glops of latex gel can cause printer inks to run, especially if you apply them fresh from the printer.
If you’re working with an inkjet photo make sure it has an hour or more to dry so the inks are set before applying the photo to the gel medium.
While slightly less vivid, toner is more forgiving than ink when it comes to a photo transfer.
Transferring a photo from an inkjet printer to canvas
As stated earlier, don’t try this process with an actual photograph!
The photo chemicals and the transfer medium don’t mix, and you’ll end up with an uneven (and unsatisfying) photo transfer.
Make a color copy of your photograph instead, or try printing it on standard paper.
Remember, the thinner the paper the less you’ll have to remove later during the rubdown stage.
However, if your paper is too thin it will tear as the transfer gel soaks into it.
You’re looking for the thinnest paper that you can comfortably position and press onto canvas.
Experiment to find the best paper for your photo transfer.
No such thing as failure!
Not ever photo transfer works out right, especially your early efforts.
But don’t be so quick to toss those experiments out.
You might have created a beautiful mess, a happy accident, where the picture is distorted in a visually pleasing way.
That’s how art happens!
Tell people this is what you intended all along when you set out to create this project.
A couple of coats of Mod Podge will build up a glossy finish layer that protects the surface of your work.
Now your picture is ready to hang in a modern art gallery!
Angela Kenny
If I do the tissue paper method for printing, after it has printed what do I have to do with the guide paper that was taped/glued at the edges of the tissue paper?
Rob Errera
Carefully peel off the tape to remove the tissue paper from the guide paper, Angela. If you’re really careful, you can put that guide sheet back in your printer. If not — or if you used glue to bind the tissue paper to the guide paper — then toss the sheet of guide paper in the recycle.
Hannah Day
Hi, I’ve created art using this method many times but recently, I’ve had white marks coming through my image. I use a little oil to bring the image back and get rid of the marks but after I spray varnish the white marks appear again. How can I get rid of them? Many thanks, Hannah
Rob Errera
Hmm. Did you make sure you removed all wrinkles and air bubbles when you placed the image, Hannah? You probably did; you sound like a pro. Have you tried different types of backing papers? There might be some type of imperfection in the paper binding, mod podge, or even the oil you use to restore the images. Try experimenting with a thinner backing paper and a new container of mod podge (if you use liquid, try using gel, or vice versa). Good luck, Hannah!
Anne G
How do you do a large canvas from a printer?
Rob Errera
Our best advice is to use imaging software that allows you to break large images into a series of printable 8.5 x 11-inch sections. From there, it’s a matter of aligning the printed sheets and taping the backs together so the full image appears on the front, ready to transfer. Good luck, Anne!